Flash the image
Write the AryaOS image to a microSD card, then boot your Raspberry Pi from it. The quickest route is AryaOS Imager. This downloads the image for you. Raspberry Pi Imager and balenaEtcher also work if you already have them.
Flashing erases the card
Writing an image overwrites everything on the target microSD card. Double-check the drive you select before you start.
Before you begin
- A supported Raspberry Pi and a microSD card of at least 16 GB (32 GB recommended) - see Hardware & requirements.
- A workstation running Windows, macOS, or Linux.
- The AryaOS image file (next section).
Get the image
If you use AryaOS Imager you can skip this section - it fetches the current image itself.
| Source | Where | When to use |
|---|---|---|
| AryaOS Imager | github.com/snstac/aryaos-imager | Easiest: picks up the latest image automatically |
| GitHub Releases | github.com/snstac/aryaos/releases | Downloading the .img.xz by hand |
| CI artifacts | GitHub Actions build artifacts on the repo | Testing an unreleased build your team pointed you to |
Downloaded by hand, the image is a compressed .img.xz. Every tool below reads .img.xz directly - you do not need to decompress it first.
Every release has signatures and bills of materials
Each image build attaches an SPDX and CycloneDX software bill of materials (SBOM) to its GitHub Release. All AryaOS packages install from the signed apt repository. See SBOM & supply chain.
Flash the card
AryaOS Imager is a single-purpose build of Raspberry Pi Imager that offers only AryaOS. It downloads the image for you. Thus, there is no file to find and no way to pick the wrong operating system.
| Platform | Download |
|---|---|
| Windows | AryaOS-Imager-Setup-*.exe (installer) or aryaos-imager.exe (portable) |
| Linux | aryaos-imager - an x86-64 binary |
| macOS | not built yet - use Raspberry Pi Imager or balenaEtcher |
- Download and install AryaOS Imager.
- Insert the microSD card into your workstation.
- Open AryaOS Imager and choose AryaOS (latest release). A latest dev build is also offered - that one bakes in lab access and is not for field use.
- Under storage, select the microSD card. Confirm the device - this erases the card.
- Write, and wait for the verify step to finish.
Windows shows a SmartScreen warning, and you cannot yet checksum the fix
The installer is not code-signed, so Windows displays "Windows protected your PC". Click More info > Run anyway.
Releases publish a SHA256SUMS.txt, but as of v1.0.0 it covers only the Linux binary. The Windows installer, the portable .exe and the callback relay have no published checksum. So on Windows there is currently no way to verify the download. The "run anyway" step is a genuine trust decision. Prefer the Linux build where you have the choice, and re-check SHA256SUMS.txt on newer releases.
The image itself is a separate matter and is verifiable. Every AryaOS release publishes an SBOM and an uncompressed-image SHA. The imager verifies what it wrote after writing it.
There is no OS-customization step to skip: AryaOS configures itself on first boot, so the imager deliberately leaves those settings alone.
Raspberry Pi Imager is the recommended tool. It runs on Windows, macOS, and Linux.
- Install Raspberry Pi Imager if you do not already have it.
- Insert the microSD card into your workstation.
- Open Raspberry Pi Imager.
- Under Choose OS, scroll to the bottom and select Use custom, then pick the downloaded AryaOS
.img.xz. - Under Choose Storage, select the microSD card. Confirm the device - this erases the card.
- Click Next, confirm, and wait for the write and verify steps to finish.
Skip the OS customization prompt
If Imager offers to apply hostname, Wi-Fi, or user settings, choose No / skip it. AryaOS personalizes its own hostname and hotspot on first boot. pre-seeding those settings can conflict.
balenaEtcher also writes AryaOS cards on Windows, macOS, and Linux.
- Download and install balenaEtcher.
- Insert the target microSD card.
- Open balenaEtcher.
- Select Flash from file and choose the AryaOS image.
- Select the target microSD card.
- Click Flash.
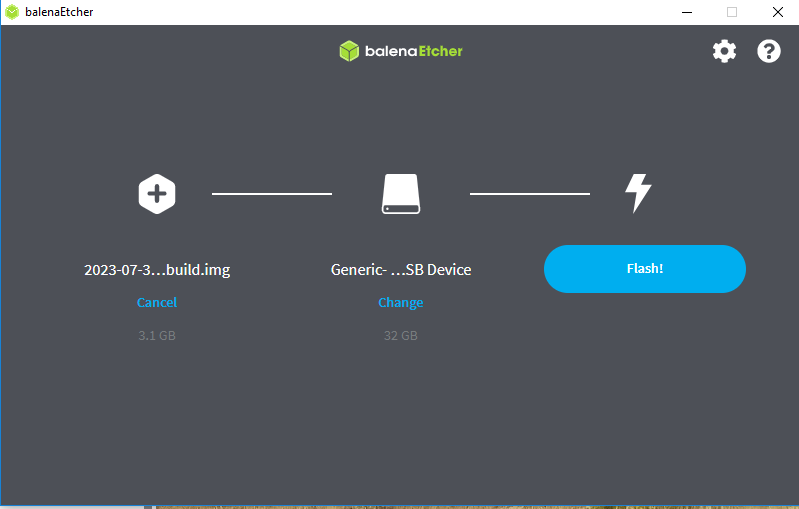
When the write finishes, balenaEtcher verifies the image automatically and then ejects the card.
Boot the Pi
- Eject the microSD card from your workstation.
- Insert it into the powered-off Raspberry Pi.
- Attach any radios, antennas, and GPS you plan to use (see Hardware & requirements).
- Apply power.
Within a few seconds the AryaOS device flashes its green and red LEDs as it starts up.
First boot takes about 120 seconds
A brand-new AryaOS device spends roughly two minutes on its first boot resizing the filesystem, choosing a unique identity. Generating its own web certificate. This only happens once. See First boot & first login for exactly what happens and how to connect.
Next step
- First boot & first login - Connect to the hotspot, log in, and secure the device. First boot & first login